Shift Profiles
Contact centers operate on a 24x7 basis, and the employees work in different work shifts. In order to generate shifts for employees, the structure of a shift must be well-defined. WFO Live requires a list of shifts to mix-and-match against the forecast requirements in order to produce a schedule with the least amount of surplus or shortage.
This option allows a user to create and modify shift profiles for a workgroup. Every workgroup created has a default shift profile name, which can be modified.
What do you want to do?
Tasks in this Topic Include:
- Wizard
- Create Shift Profiles
- Adding Individual Shift Profiles
- Edit Shift Profile
- Delete Shift Profile
- Copy Profiles
- Default Profiles
- Modify Weekday Shifts
- Setup Full-Time Shifts
Related Tasks:
See Also:
Wizard
The Wizard is used to create new shift profiles. All the variables can be entered in one location. Clicking Apply populates the Shift Profile table with this information.
Create Shift Profiles
- Select Setup > Shift Profiles.
- Click New.

- Enter a new Shift Profile name.
- Select the Wizard tab.
- Enter the earliest shift start time in the Earliest Start Time field.
- Enter the latest shift end time in the Latest End Time field.
- Enter the minimum amount of hours in the shift in the Min. Shift Length field.
- Enter the maximum amount of hours in the shift in the Max. Shift Length field.
- Enter the amount of allowable lunch hours in the Lunch Window field.
- Enter a numerical value that denotes the offset for lunch time window in the Lunch Window Offset field.
- Enter the number of minutes for the first break in the Break 1 Length field.
- Enter the number of minutes for the second break in the Break 2 Length field.
- Enter the number of minutes for the lunch break in the Lunch Length field.
- Enter the start minutes of the next shift in the Increment Size field.
- Enter the hourly cost for the shift in the Hourly Cost field. The Hourly Cost is the length of the shift in hours.
- Select Apply.
- The profile will be filled in.
Adding Individual Shift Profiles
- Select the profile from the Shift Profile dropdown.
- Select Add Row.
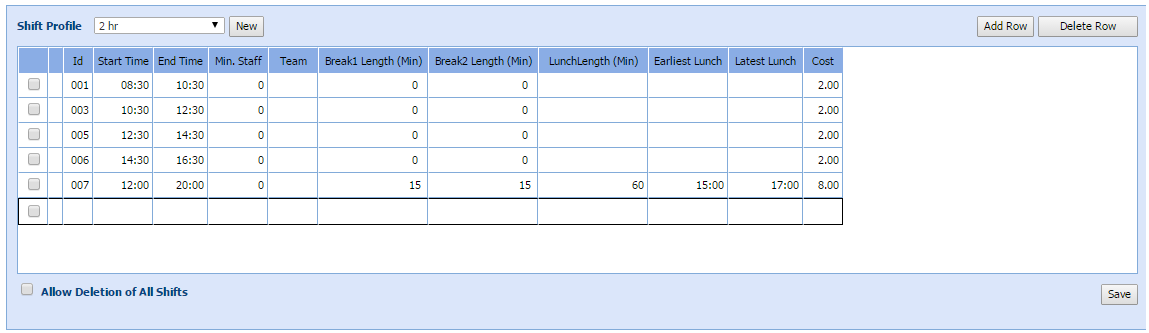
- Click in the desired cell to enter values.
- Enter a Start Time.
- Enter an End Time.
- Enter a Break 1 Length (if applicable).
- Enter a Break 2 Length (if applicable).
- Enter LunchLength (if applicable).
- Enter the Earliest Lunch (if applicable).
- Enter the Latest Lunch (If applicable).
- Enter the Cost for the profile.
- If Allow Deletion of All Shifts is checked, the shift profile will be deleted. This is useful if the shift is not needed anymore, or to clean up clutter.
- Select Save. The system displays Shift File [name] updated.
Edit Shift Profile
- Select the Shift Profile to adjust.
- Double-click the field that needs to be updated.
- Enter the new values as required.
- Select Save.
Delete Shift Profile
This option allows you to permanently delete a shift profile from the database. Normally a shift profile is deleted only if the workgroup no longer requires it.
- Select a Shift Profile from the drop-down menu.
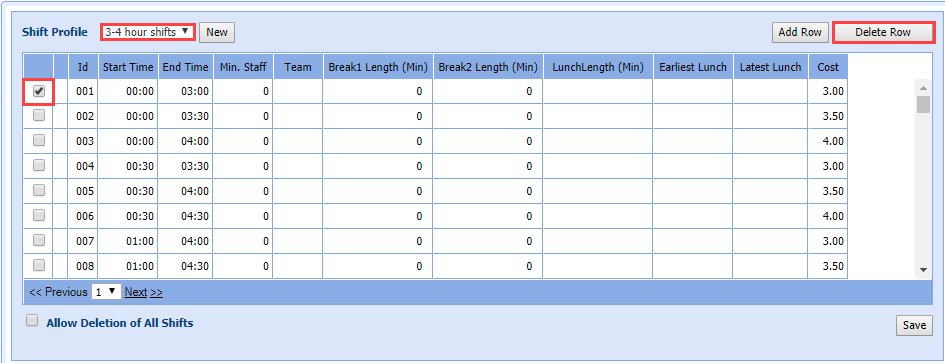
- Select the check box next to the row to be deleted.
- Select Delete Row.
Copy Profile
Shift profiles can be copied for the same, or different workgroups. This reduces the contact center manager’s workload when shift profiles with common structures are required, and is also useful in planning a change.
- Select the Copy Profile tab.

- Select the workgroup from which the shift profile will be copied from the Workgroup drop-down menu.
- Select the shift profile from the Shift Profile to be copied drop-down menu. This is the source file from which you want to copy data.
- Select the shift profile from the Shift Profile to receive copy drop-down list. This is the target file to which you want to copy data. This file must be different from the file selected from the Shift Profile to be copied drop-down menu.
- Or click New to create a new set of profiles in the correct workgroup.
- Click Copy Shift Profile.
Default Profiles
The roster generation process will use the default profile when assigning shifts to agents, unless otherwise specified in the agent availability settings. It is set by clicking the cell under Shift Profiles, and choosing a profile from the drop-down list.
Modify Weekday Shifts
- Select the Default Profiles tab.
- Select the Shift Profile cell to enable the drop-down menu.
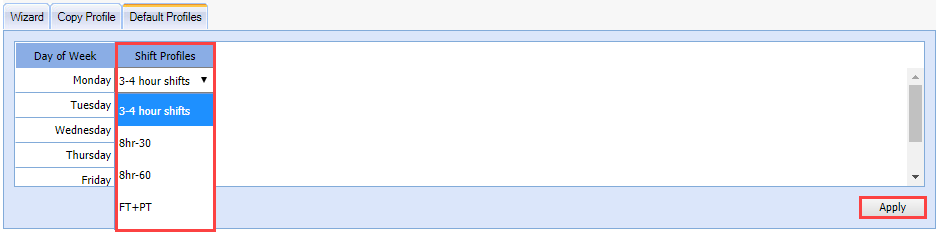
- Select a Shift Profile.
- Select Apply.
Setup Full-Time Shifts
Under Setup > Workgroups > Shift Rules the length of full-time, as well as part-time, shifts for various workgroups operating in a contact center are set. Currently, a full-time shift is defined as any shift that lasts more than 7.5 hours long. Any shift shorter than this is classified as part-time.
- Select Setup > Workgroups.
- Select Shift Rules.
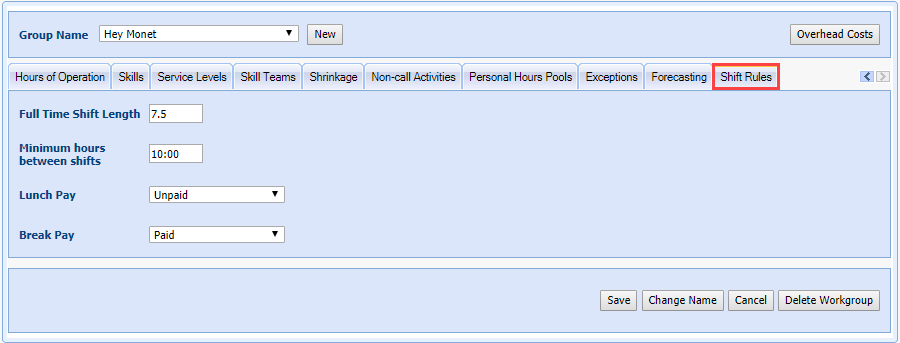
- Enter the length of a full-time shift in the Full Time Shift Length field.
- Enter the Minimum hours between shifts in hours.
- Select the Lunch Pay status from the drop-down menu.
- Select the Break Pay status from the drop-down menu.
- Select Save.